

Hey there! As a supplier of Infrared Shower Saunas, I'm super stoked to walk you through the installation process of these amazing units. Infrared shower saunas are a game - changer, offering the combined benefits of a relaxing sauna session and a refreshing shower all in one. So, let's dive right in!
Pre - installation Checks
Before you even start unpacking that shiny new Infrared Shower Sauna, you've got to do some pre - installation checks. First up, you need to pick the right spot. The location should be well - ventilated to prevent the buildup of steam and moisture. Also, make sure the floor is level and can support the weight of the sauna. You don't want your sauna tipping over or causing your floor to sag!
Measure the area where you plan to install the sauna. Double - check that the dimensions you've got match up with the size of the sauna unit you've ordered. It's always better to be safe than sorry. And don't forget about the electrical requirements. Make sure there's a proper electrical outlet nearby that can handle the power needs of the infrared sauna. Usually, infrared saunas don't require as much power as traditional saunas, but it's still crucial to get this right.
Unpacking and Assembly
Once you've sorted out the location and electrical stuff, it's time to unpack the sauna. Be really careful when you're opening the box. You don't want to accidentally damage any of the components. Lay out all the parts on a clean, flat surface and check them against the parts list that came with the sauna. If you find any missing or damaged parts, reach out to us right away, and we'll sort it out for you.
Now, onto the assembly. Most of our Infrared Shower Saunas come with detailed assembly instructions. Start by assembling the frame. It's usually made up of a few pre - cut pieces that fit together like a puzzle. You might need some basic tools like a screwdriver and a wrench, but don't worry, it's not rocket science. Just follow the instructions step by step, and you'll have the frame up in no time.
After the frame is assembled, it's time to attach the panels. The panels are what give the sauna its structure and insulation. They're usually made of high - quality wood or other materials designed to hold in the heat. Slide the panels into place on the frame and secure them using the provided screws or fasteners. Make sure they're aligned properly so that the sauna looks neat and functions well.

Plumbing Installation
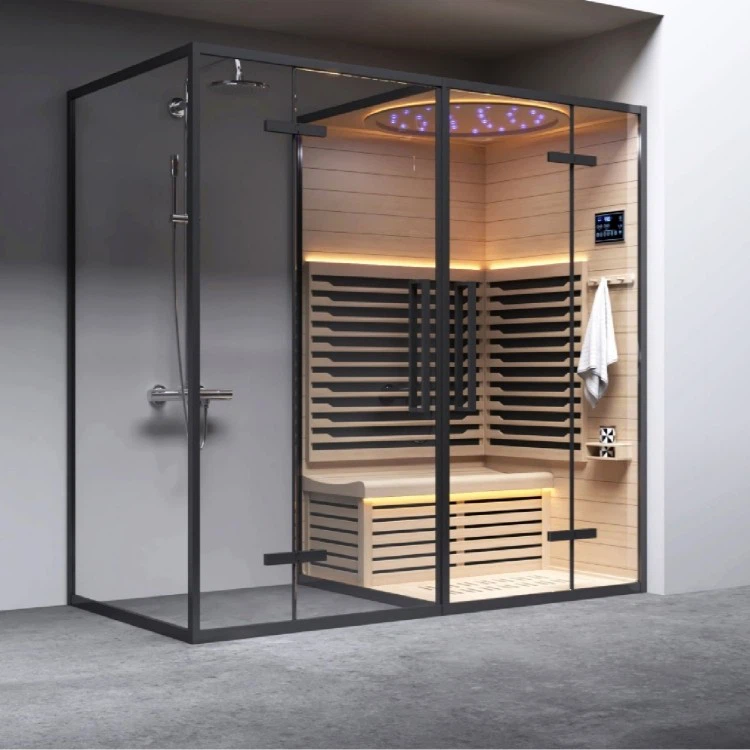
One of the key features of an Infrared Shower Sauna is the shower part. For the plumbing installation, you'll need to connect the water supply lines. First, turn off the main water supply to your house to avoid any leaks or mess. Then, find the water inlet ports on the sauna. You'll need to connect the hot and cold water lines to these ports.
Use appropriate plumbing fittings to make a tight connection. You might want to use some Teflon tape on the threads of the fittings to prevent any leaks. Once the water lines are connected, turn the water supply back on and check for any leaks. If you notice any drips, tighten the fittings a bit more until the leak stops.
Next, you'll need to install the drain. The drain is usually located at the bottom of the sauna. Connect it to the existing drain line in your bathroom using a suitable pipe. Make sure the connection is secure and that the drain slopes downward to allow for proper water flow.
Electrical Installation
Electrical installation is a critical part of the process, and it's best to have a qualified electrician handle it if you're not experienced with electrical work. The infrared heating elements in the sauna need to be properly wired to the electrical source.
The electrician will first need to install a dedicated circuit breaker for the sauna. This is important to ensure that the sauna has enough power and to prevent any electrical overloads. Then, they'll run the electrical wires from the circuit breaker to the sauna's control panel. The control panel is where you'll be able to adjust the temperature and other settings of the sauna.
After the wires are connected to the control panel, the electrician will connect them to the infrared heating elements. These elements are what generate the heat in the sauna. Make sure all the connections are tight and that there's no exposed wiring.
Testing and Final Checks
Once the plumbing and electrical installations are done, it's time to test the sauna. First, turn on the power and check the control panel to make sure all the settings are working properly. Set the temperature to a low level and wait for the sauna to heat up. You should start to feel the gentle warmth of the infrared rays.
Next, turn on the shower. Check the water pressure and the temperature of the water. Make sure the water is flowing smoothly through the showerhead and that there are no leaks.
Do a final visual check of the sauna. Look for any loose screws, gaps in the panels, or any other issues. If you find anything, make the necessary adjustments.
Wrapping Up
So, there you have it - the installation process of an Infrared Shower Sauna. It might seem like a lot of work, but with the right tools, a bit of patience, and following the instructions, you can have your sauna up and running in no time.
If you're interested in purchasing an Infrared Shower Sauna, we've got some great options for you. Check out our Sauna Shower Combo, Infrared Steam Shower, and Sauna Steam Shower Combo on our website.
If you have any questions about the installation process, the products, or if you're ready to make a purchase, don't hesitate to reach out. We're here to help you every step of the way.
References
- General knowledge about infrared shower sauna installation from the industry experience
- Manufacturer's installation guides for Infrared Shower Saunas.